photo SUPER THIN LINE 4_zps4xjugusw.png  photo ENTER 188X24_zpsan0no3qw.png  photo HOLIDAY 134X24_zpsivdh8utq.png  photo PROJECTS 118X24_zpsmt1mfnap.png  photo RECIPES 112X24_zps5kyaynje.png  photo SHOP 100X24_zpsgecoqzk4.png  photo CONTACT 134X24 SECOND_zps0icpk3so.png  photo PRESS 100X24_zpszfhijryx.png  photo SUPER20THIN20LINE204_zpsq5i2ucyd.png

November 27, 2013

Thanksgiving Wishes


*images 1 // 2 // 3

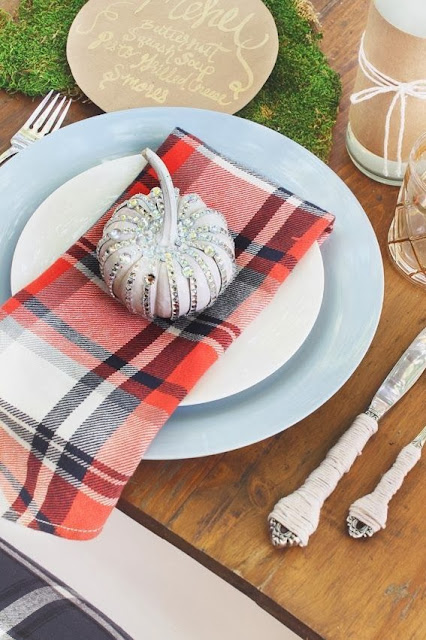
Happy Thanksgiving Eve!  Are those not some of the prettiest table settings?  You can click the image number above for the full post to these amazing tablescapes.

Well it's almost here!  Since the final hours are upon us, I'm signing off for the rest of the week to enjoy the holiday with my family.  We'll be running around Texas over the next few days, which means a lot of car time, which in turn means a lot of instagram time.  So come join me on instagram :)

Wishing everyone a very Happy Thanksgiving!


November 25, 2013

my go to cookie


Happy Thanksgiving Week!  It seems a little odd saying that as I feel it has really come up quickly.  For you too?  Speaking of odd, we actually got our Christmas tree put up yesterday - yikes!  I don't usually do any Christmas decorating until after Thanksgiving, but we'll be out of town for Thanksgiving and we have to make an unexpected trip to Dallas, so we went ahead and pulled it out.  But it sure was nice sitting by it's glow last night with a warm fire.  Loved it!!  But really looking forward to celebrating Thanksgiving before I fully embrace Christmas. 
 
Now on to my post topic...do you have a quick, easy recipe that you use frequently?  Today I thought I would share my go to cookie with you.  Not only is this cookie super easy to make with only 3 ingredients and no baking, but it's really yummy too.  And the main reason I make this cookie a lot is that I almost always have two of three ingredients on hand.  My kids eat PB&J sandwiches about three times a week, so I always have peanut butter.  And crackers are a regular in my pantry as well.  So usually the only ingredient I need to pick up is the chocolate bark.  If I need to bring a refreshment/dessert type food and I'm short on time, this is my fall back cookie.  They would also be perfect for a cookie exchange!
 

Chocolate Covered Ritz Peanut Butter Cookies
Ingredients
  • Ritz crackers
  • Creamy Peanut Butter
  • Chocolate Bark
Method
  1. Spread peanut butter between two crackers and sandwich together
  2. Melt chocolate bark as directed
  3. Dip the whole cracker with peanut butter in chocolate and fully coat
  4. Removed from chocolate and place on wax paper to cool
And that's it.  No preheating.  And no baking!  Easy Peasy :)


So simple, so good.
Enjoy your day!


November 22, 2013

Five on Friday // Thanksgiving Prep


Happy Friday!  So, do you have big plans for Thanksgiving?  Are you hosting?  We have my husband's family get together in town on Thursday and then head out of town on Friday to spend Thanksgiving with my family.  I'll for sure be ready to pop by Friday evening, as I seem to think I have to sample everything :) 

Whether you host or head to someone else's adobe for Thanksgiving, here are some easy recipes and décor ideas that might help with your holiday festivities.

1.  Pumpkin Roll -- try this dreamy pumpkin roll filled with gooey cream cheese.  You can find the recipe here.

 2.  Easy Inexpensive DIYs for you Thanksgiving Table --  add some glam to your table with gold spray paint and gold glitter.  Use fresh flowers, ribbon and candles to finish it off.  You can find this tablescape here.

3.  Pecan Cheesecake Bars -- shortbread, cheesecake and pecan pie all in one bar...these are the perfect addition to your Thanksgiving feast.  Scrumptious recipe right here.

4.  Simple Rustic Tablescape -- use natural elements to create a pretty tablescape using pinecones and fresh clippings.  Full tablescape can be found here.

5.  Pumpkin Spice Cheesecake Blossoms -- yep, these are pretty awesome too.  Taste-tested and approved, these little gems are sure to be a hit.  Find the recipe here.
 
And that's a wrap.  Hope you can find something pretty or yummy for your Thanksgiving in that roundup!
 
Also linking with the five on Friday group.  Go check out what these lovely host are up to DarciNatasha, Christina, & April.

Have an amazing weekend!

you can also find me here:


November 21, 2013

Operation Smiles & Campus Book Rentals

Good Morning!  Today, on behalf of Campus Book Rentals, I'm switching gears to discuss an amazing international charity, Operation Smiles.  As one of the most prominent charities for children in the world, they work in over 60 countries to heal children’s smiles and bring hope for a better future for these children.  This is a charity that is dear to me.  I worked in Pediatric and Neonatal ICU for 11 years, and took care of many babies who were born with cleft lip and cleft palate.  I know first hand the struggles these babies have, and an organization like Operation Smiles provides these children with a future filled with hope.


With the holiday/giving season upon us what better time to help a child.  Operation Smile has a gift catalog  or a monthly donation program where you can help these precious children.  And if you're in college or if you have a family member in college, know that Campus Book Rentals donates to Operation Smile with every textbook rented.  They've already donated over 1,000 cleft lip surgeries this year.  Here's a short video explaining how Campus Book Rentals works.


Lastly, Campus Book Rentals now has a new initiative that can earn you some money.  Rent Back allows students to rent the textbooks they own to other students.  Which can make you 2-4 times more money compared to what you would make through a buyback option.

So in closing, here are the highlights: 
  1. Campus Book Rentals saves you money when you rent your textbooks.
  2. Rent Back gives you the option to make money on the textbooks you own and
  3. Operation Smiles receives a donation with each textbook rented.
 
I hope you'll consider Operation Smiles for your next charitable contribution this holiday season.
 
*this is a sponsored post, but all opinions are 100% my own

November 20, 2013

DIY Holiday Garland // Guest Post

Good morning!  Today I'm excited to have Kayla from Home Coming share her awesome DIY holiday garland with us.  She is a true DIYer and her blog is filled with amazing home projects.  So here she is now!

Hi everyone! I'm Kayla from Home Coming and I'm so honored to be a guest here at This is Happiness! I'm a DIY and home blogger, who teams up with my carpenter husband (Justin). We both have a lot of love for updating a house on a budget. Justin is a carpenter by day (so he's handy) and I'm in advertising (so I'm creative), so we're the perfect team for taking on the task of updating our 1920's Minneapolis house. Check out the progress we've made on our home and other DIY projects here!

Today I wanted to share a simply holiday decor project to get the holiday season started!

DIY Holiday Banner

Not that long ago, I made a glittered banner for my best friend's bachelorette party that turned out so great and was super easy, so I decided that a Holiday glitter banner would be a perfect addition to my growing Holiday decor collection.

Overall this project cost me $10 and only took 30 minutes (not including dry time), but has made such an impact to my Holiday vignette in our living room.

What you'll need:
 - Stencils: I DIY'ed my stencils. More on that later.
 - Scissors
 - X-acto Knife
 - Hole Punch
 - Tagboard
 - Krylon Glitter Spray Paint
 - Twine

I decided to DIY my stencil so I could choose the exact font that I liked, so I printed my "BE MERRY" letters in 720 point font on regular computer paper.

Holiday Banner Stencil

After cutting out my stencils, I traced my letters on the tagboard and cut them out. I chose to use a scissors on the straight edges, and the Xacto knife for the curves and the inside areas.

DIY Holiday Banner Tagboard

Then onto my best friend - spray paint! Micheal's carries Krylon Glitter Spray Paint which I love. I purchased it in Candy Apple Red.

DIY Holiday Banner Glitter

After allowing for about an hour of drying time, I punched a hole in each top corner of each letter. Then it was as simple as stringing the twine through the holes, and tying a loop at the end of each end of the twine to hang on the wall.

DIY Holiday Banner String

And here's the final product! I love how the red looks with our mint walls and my new winter decor that I just purchased from Target (reindeer, wreath and trees) and Ikea (red frame). Next on my list, making (or finding!) a printable for that red frame.

DIY Holiday Banner Close
DIY Holiday Banner Table

I hope you enjoyed this simple DIY and let me know if you make one yourself! I'd love to see how it turned out.

Thanks so much to Becky for letting me visit today! 

Such a cute garland perfect for the holidays!  And I love it against her mint walls!  Thank you Kayla.  Have a great day friends!


November 19, 2013

Easy DIYs For Your Thanksgiving Table

Last week I shared this as a guest post, but I also wanted to share all the details on my site as well.

So here are a couple of easy, inexpensive DIYs to glam up your Thanksgiving table.  And if you've been reading for awhile (thank you) it's no surprise that gold, glitter and leopard will be part of this year's thankful table :)


The first DIY is this gold, glitter table runner.  It always seems as though I can never find a table runner to fit my style.  So after several unsuccessful attempts to find one that I liked enough to purchase, I decided to make my own. 

 
I love Target's $1 wrapping paper!  It's the perfect size to use in the middle of a table.  I found this brown polka dot paper which I really liked but felt it needed a little something.  So using a gel adhesive with a round sponge applicator and gold glitter, I was able to transform it into a chic table runner.  *tip - If you want to reuse your runner, you can go to the hardware store and have an inexpensive, clear laminate piece cut to protect it from drinks, etc.
 
 
Next up are these gold leaf place cards.  I wanted to add a special touch to my place setting and I think these hit the mark.
 

A couple of weeks ago, I took my family on a scavenger hunt for leaves.  We decided on these big maple leaves, so we collected about 10 and I pressed them in a book for about 2 weeks.  Next I pulled them out and added a quick coat of gold metallic spray paint.  For the names, I used clear laser labels.  Once I found a font I liked I simply printed and cut out each name and stuck it to the leaf.  I considered writing the names with a sharpie, but my handwriting is not the best, so this worked better for me.

 
In addition to my DIYs, I finished off this table with animal print ribbon, candles, and some fresh flowers.  I love how simple it is, and it is really pretty at night when all the gold and glitter shimmers in the dim lights.  Looking forward to sitting here with my family in only a few short days!


Hope you all have a great day!

In case the gold bug has not bitten you, here is my much different Thanksgiving tablescape from last year.  The link below the picture will get you to the full post. 


{sharing here: the blissful bee}

November 18, 2013

pecan cheesecake bars


Pecan Cheesecake Bars

Ingredients

1 1/2 cups flour
1 1/2 cups firmly packed light brown sugar, divided
1/2 cup butter, softened
2 cups finely chopped pecans, divided
2 (8 ounces) packages cream cheese, softened
1/2 cup sugar
1/2 cup milk
2 1/2 teaspoons vanilla extract, divided
1/2 cup light corn syrup
1/3 cup butter, melted and cooled slightly
3 large eggs
1/4 teaspoon salt

Method

Preheat over to 350.

For the shortbread bottom layer:  In a medium bowl, combine flour and 3/4 cup brown sugar.  Mix in softened butter until it resembles coarse crumbs.  Stir in 1/2 cup pecans.  Press mixture evenly into the bottom of a greased 9x13 baking pan.  Bake for 10 minutes, remove from oven, and cool slightly for about 10 minutes.

For the cheesecake middle layer:  Place softened cream cheese in bowl and beat at medium speed until smooth.  Beat in sugar.  Add milk and 2 teaspoons vanilla and beat until combined.  Pour cream cheese mixture over the cooled shortbread layer.  Bake for 15 minutes, remove from oven and cool slightly for about 10 minutes.

For the pecan pie top layer:  In a medium bowl, combine the remaining 3/4 cup brown sugar, corn syrup, and melted butter.  Gently stir in the eggs, salt and remaining 1/2 teaspoon vanilla.  Stir in 1 1/2 cups pecans.  Pour pecan mixture over cooled cheesecake layer.  Bake for 35-40 minutes or until center is set and pecan pie layer is a rich brown color.

* original recipe from Positively Splendid


Good Morning!  Hope you had a lovely weekend!  Ours was filled with kid activities as usual, with Preston playing his last football game on Saturday and performing in his first piano recital on Sunday.  To celebrate a successful piano recital, dinner at one of Preston's favorite restaurants finished off our weekend. 

A couple of weeks ago, I was looking for a new recipe to make for Thanksgiving and I pinned this one.  So I thought before I brought them to share with my family, I needed to taste test them first and make sure they tasted as good as they looked.  So I whipped them up over the weekend and they are amazingly good!!  Really, how could they not be with three layers of goodness...yummy shortbread on the bottom, tangy cheesecake in the middle, finished off with my favorite Thanksgiving dessert...a delicious pecan pie layer.  These will no doubt be a perfect addition to our Thanksgiving meal.  Hope you enjoy!

You might also enjoy these yummy recipes for your Thanksgiving feast.  All taste-tested and approved recipes :)  The links below each picture will get you to the recipe.


All these and more filed under my FOOD tab at the top.  Have a terrific day!!


November 14, 2013

Thanksgiving Table DIY's


Hi there!  I'm guest posting over at the Home Coming blog today about easy, inexpensive ways to glam up your Thanksgiving table.  Swing by to see all the details and check out Kayla's blog and all her amazing DIY projects

Have a great day!


November 12, 2013

a heart of gold


You may remember that I mentioned I wanted to change up my kids' rooms a bit.  I've made a few changes in Preston's room, like this diy wall letter and this space saver desk.  Still not calling his room complete, but it's close.  Lyla's room on the other hand has stumped me.  We moved her furniture around, but ended up moving it back and I just didn't know what I wanted to do in her room.  She's in kindergarten and 5 1/2 yrs, so I didn't want anything too babyish :( but nothing too grown up either.  And then I saw an instagram picture posted by the sweet talented Sarah.  It was this giant adorable metallic gold heart from Urban Walls that she put over her daughter's bed and I knew I had to have it. 
 
We got it up Saturday evening and I heart it SO much!  Seriously, I've walked in her room many times just to look at it again ;)  I finally feel like I have a starting point for her room.  I still have some other plans for this room, like new bedding, a new lamp and art work, but this heart makes me so happy to walk in her room even with everything else not complete.  And the best part is that Lyla absolutely loves it!  I think it fits her personality and her age perfectly.  I even told my husband I love it so much, I'm tempted to buy another one just in case we move...ha!
 
Have a fantastic day!


November 11, 2013

cute pjs


Good Morning Friends!  Hope you all had a lovely weekend!  In the Fall and Winter months when it gets dark early and we are home, I am in my jammies at a very early hour.  So I love having some cute comfy pjs to lounge around in.  Victoria's Secret always has a great selection and they are usually reasonably priced as well.  These are a few of my faves!
 
Have a great day!